既存の Hugo テーマを Netlify CMS に対応させる

1. はじめに
Netlify CMS は,Netlify 社が提供する Headless CMS です。Netlify CMS を用いることで,Gatsby や Hugo などの静的サイトジェネレーターを WordPress ような CMS で運用することが出来ます。本記事では,Netlify CMS のドキュメントに従って,既存の Hugo テーマを Netlify CMS に対応させる手順を記述します。
本記事で行う作業は,Hugo Ver.0.80.0 と Zorin OS 15 Core (Ubuntu 18.04 LTS) の環境下で実行したものです。また,Netlify と GitHub を活用します。これらのソフトやサービスの初期設定は完了済みの前提で記述しており,設定手順などは割愛していることを,ご了承下さい。
2. 雛形作成
まず初めに,(1) Hugo のクイックスタートガイドに従って Netlify CMS に対応させる Hugo テーマを作成します。(2) Host on Netlify を参考に,Netlify の設定ファイルである netlify.toml を作成します。 (3) (1) と (2) で作成した Hugo テーマを GitHub にコミットし,Host on Netlify を参考に GitHub と Netlify の連携,Hugo テーマのビルドを行います。
1# (1)2$ hugo new site quickstart3$ cd quickstart4$ git init5$ git submodule add https://github.com/budparr/gohugo-theme-ananke.git themes/ananke6$ echo 'theme = "ananke"' >> config.toml7$ hugo new posts/my-first-post.md8
9# (2)10$ touch netlify.toml11
12$ tree -L 313.14├── README.md15├── archetypes16│   └── default.md17├── config.toml18├── content19│   └── posts20│       └── my-first-post.md21├── data22├── layouts23├── netlify.toml24├── static25└── themes26    └── ananke27        ├── CHANGELOG.md28        ├── (省略)29        └── theme.toml
上記の手順を行うことで,Hugo テーマが Netlify 上でビルドされます。しかし,2 点ほど注意することがあります。
1 つ目は,my-first-post.md の draft を false に設定する点です。Hugo のクイックスタートガイド では,my-first-post.md の draft が true に設定されているため,この状態ではビルドされないので注意が必要です。
2 つ目は,config.toml の baseURL を Netlify が発行する URL に置換する点です。デフォルトの状態では http://example.org/ が設定されていますが,この状態ではファイルの読み込みエラーが発生するため,置換が必要です。
1---2
3title: "My First Post"4date: 2019-03-26T08:47:11+01:005draft: false6
7---1baseURL = "https://xxx.netlify.app/"2languageCode = "en-us"3title = "My New Hugo Site"4theme = "ananke"1[build]2publish = "public"3command = "hugo --gc --minify"4
5[context.production.environment]6HUGO_VERSION = "0.80.0"7HUGO_ENV = "production"8HUGO_ENABLEGITINFO = "true"9
10[context.split1]11command = "hugo --gc --minify --enableGitInfo"12
13[context.split1.environment]14HUGO_VERSION = "0.80.0"15HUGO_ENV = "production"16
17[context.deploy-preview]18command = "hugo --gc --minify --buildFuture -b $DEPLOY_PRIME_URL"19
20[context.deploy-preview.environment]21HUGO_VERSION = "0.80.0"22
23[context.branch-deploy]24command = "hugo --gc --minify -b $DEPLOY_PRIME_URL"25
26[context.branch-deploy.environment]27HUGO_VERSION = "0.80.0"28
29[context.next.environment]30HUGO_ENABLEGITINFO = "true"3. ファイル追加
Netlify CMS のドキュメントに従って,上記の 2 章で作成した Hugo テーマ (Ananke) を Netlify CMS に対応させる手順について記述します。まず初めに,static ディレクトリの直下に admin ディレクトリを作成します。作成した admin ディレクトリの直下に,index.html と config.yml を作成します。
1$ mkdir static/admin2$ touch static/admin/index.html3$ touch static/admin/config.yml4
5$ tree -L 36.7├── README.md8├── archetypes9│   └── default.md10├── config.toml11├── content12│   └── posts13│       └── my-first-post.md14├── data15├── layouts16├── netlify.toml17├── static18│   └── admin19│       ├── config.yml20│       └── index.html21└── themes22    └── ananke23        ├── CHANGELOG.md24        ├── (省略)25        └── theme.toml
本記事で採用している Hugo テーマである Ananke は,content/posts 直下の Markdown を記事としてビルドします。しかし,Netlify CMS のドキュメントに記載されている config.yml は,content/blog を読み込む設定になっています。そのため,content/blog を content/posts に変更します。
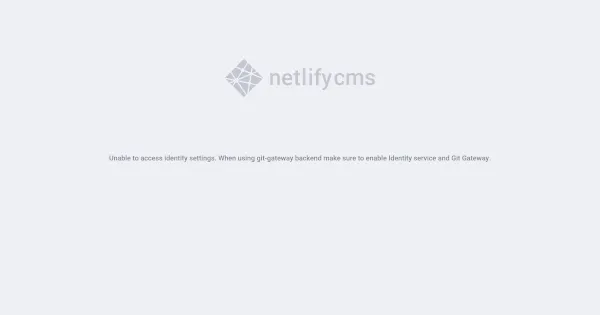
1<!doctype html>2<html>3 <head>4 <meta charset="utf-8" />5 <meta name="viewport" content="width=device-width, initial-scale=1.0" />6 <title>Content Manager</title>7 <!-- Include the script that enables Netlify Identity on this page. -->8 <script src="https://identity.netlify.com/v1/netlify-identity-widget.js"></script>9 </head>10 <body>11 <!-- Include the script that builds the page and powers Netlify CMS -->12 <script src="https://unpkg.com/netlify-cms@^2.0.0/dist/netlify-cms.js"></script>13 </body>14</html>1backend:2 name: git-gateway3 branch: master # Branch to update (optional; defaults to master)4media_folder: static/img5public_folder: /img6collections:7 - name: 'blog'8 label: 'Blog'9 folder: 'content/posts'10 create: true11 slug: '{{year}}-{{month}}-{{day}}-{{slug}}'12 editor:13 preview: false14 fields:15 - { label: 'Title', name: 'title', widget: 'string' }16 - { label: 'Publish Date', name: 'date', widget: 'datetime' }17 - { label: 'Description', name: 'description', widget: 'string' }18 - { label: 'Body', name: 'body', widget: 'markdown' }デプロイした後,https://xxx.netlify.app/admin/ にアクセスすると Login with Netlify Identity というボタンが表示されます。しかし,ログインしようとすると Unable to access identity settings. When using git-gateway backend make sure to enable Identity service and Git Gateway. というエラーメッセージが表示されます。このエラーメッセージは,次章で解決します。
4. 設定変更
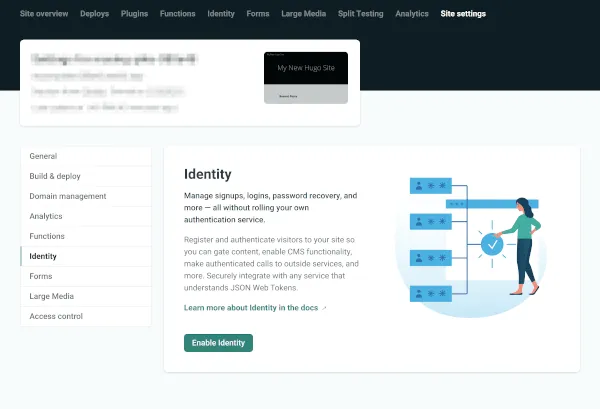
Netlify の設定を変更します。まず初めに,Site settings → Identity に移動し,Enable Identity をクリックします。
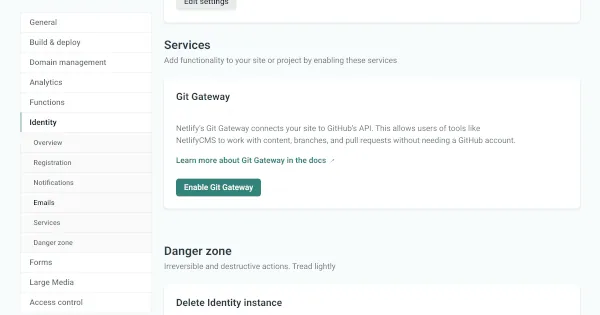
次に,Site settings → Identity → Services → Git Gateway に移動し,Enable Git Gateway をクリックします。
5. 動作確認
上記の設定完了後,https://xxx.netlify.app/admin/ にアクセスし,Login with Netlify Identity をクリックすると,Sign up と Log in モーダルが表示されます。名前,メールアドレス,パスワードを入力し,Netlify CMS 用のアカウントを作成します。注意ですが,Netlify と Netlify CMS は異なるため,Netlify のアカウント情報を入力してもログインは出来ません。

確認メールのメール内に https://xxx.netlify.app/#confirmation_token=xxx と記述されていると思います。しかし,メールに記述されている URL を叩いても認証が完了しません。認証を完了させるには,https://xxx.netlify.app/admin/#confirmation_token=xxx にアクセスする必要があります。認証完了後,https://xxx.netlify.app/admin/ にアクセスし,ログインすると以下な管理画面が表示されます。

6. セキュリティ強化
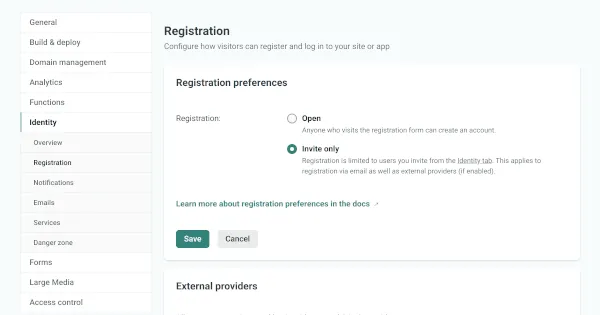
ここまでの作業で,既存の Hugo テーマ (Ananke) を Netlify CMS に対応させることが出来ました。しかし,現状の設定では誰でも Sign up 可能な状態であり,セキュリティの側面から好ましくありません。そのため,Site settings → Identity → Registration → Registration preferences の設定を Invite only に設定します。この設定よって,Sign up モダールが表示されなくなります。
7. おわりに
ここまで,既存の Hugo テーマを Netlify CMS に対応させる手順を記述してきました。本記事では,Platform Guides Hugo に記載されている config.yml を,ほぼデフォルトと状態で使用しました。非常に細かくカスタマイズすることが可能です。詳しくは Configuration Options を参照してみてください。